Friday, November 30, 2018


Strip bins...

Don't say you haven't felt this way when you opened your strip bin and started sewing.  Strip after strip and the bin never empties.  I think there's a story like that in the Bible.  Only she had flour and oil.  I'd be ok with that.  Never running out of food is a good thing. Now that I think of it, never running out of fabric would be pretty cool, too.  But I just really wanted to see the bottom of that bin.  One bin. I made three queen, one twin and one throw sized quilt from that one bin.  I no longer keep a bin of miscellaneous sized strips.  If it doesn't fit in the 2, 2.5, 3" bins then it just has to go away.  You have to draw the line somewhere.


This picture was taken last year and I got such a laugh out of it.  After the Christmas season is a tough time for me.  I love the holidays, but last year I was swamped with work and then I had a hard time winding down.  Thus the sewing frenzy.  I'm determined to pace myself this year.  I even have a list for the calendar, things to do during the months of December and January.  Because of our crazy working schedule during December, we decided to drag out the holidays through the month of January.  Taking it easy and slow.  This is supposed to be fun, right?  Sewing wise, I'm not sure where I'm going.  I think a few more place mat bags for the kids... I have a blank spot of the bathroom wall that could use a Christmas wall hanging... Bekah wants a skirt sewn onto the bottom of a pair of overalls... I still have that shirt to sew for Jacob... Not hurting for possible projects. Hoping you're all happily stitching along.  

Wednesday, November 21, 2018

 Pie making day in the USA


Let's be facing it, Thanksgiving is another reason to be thankful for pie.  I just had to share this pie crust recipe with my friends- it's too good to keep all to myself.  If you did your pie making yesterday, you can always save this recipe for Christmas. 

One of my favorite things about this recipe is that it doesn't involve a rolling pin.  There's no cutting in of shortening or butter. If I were a neater cook, there would be no floury counter top to clean. It seems too easy. The taste and texture is amazing and to be honest, I prefer the taste and texture of this pie crust over any that I've ever had.  So here goes:


Pie Crust
  • 1 1/2 cups of flour
  • 1/2 teaspoon of salt
  • 2 Tablespoons of sugar
  • 1/2 cup of oil
  • 3 1/2 Tablespoons of milk. 
That's it!


Mix the dry ingredients in the pie pan with a fork.  Whisk the milk in with the oil.  Pour over the flour mixture.


 Stir flour mixture and oil mixture together with a fork. It takes a little bit of time to get the flour completely incorporated, but trust me it will work.  All of the flour will pull away from the edges of the pan.


 Smash the dough out on the bottom and up the sides of the pan.  Tada!  You have a pie crust!  I'm so excited for you!  I didn't crimp this one, but then Bekah got involved and we went the extra mile and made the next few all fancy like.


If you want to make a pudding type pie, just bake at 425* for 15 minutes or until golden.  Otherwise, just fill the pie as usual.  You can't make a double crust pie with this recipe, but then I've been putting a crumb crust on the top of my fruit pies and that's simple, too.  This recipe works great for quiche and meat pies- just leave out the sugar.  I hope you all have a peaceful and blessed Thanksgiving.

Tuesday, November 20, 2018

 Light therapy...

Sewing therapy.  I think if you add the word "therapy" to anything you can justify spending time on it.  The days have been gloomy and oh so short.  William got me a therapy light last year and it really helped with the winter blues.  I have it sitting on my desk next to my easy chair.  I stitch on yoyos while I soak up the rays. Yoyos are one of my favorite hand work projects.  I tried hexies, but there comes a point where it get's too big and I'm puzzling over the right layout and direction.  It just got to be a bit much.  Yoyos are perfect.  Small.  Transportable.  They are always little and it takes about 3 minutes to make one. In a 15 minute light therapy session I can make about 5.  Hey, it adds up.  Plus, I work on them in the evenings watching a movie.  And even better than sewing them---  I get to cut them out!  I love cutting.  Applique is fun, but cutting out the applique, now that's a whole lot of fun. And tracing the little circles... also something you can do on your lap with a clipboard. This bag of yoyos is about full.  Time to break out a new bag.  The girls say they are going to start making them, too.  Can you imagine how many yoyos three people could make?  I sew them together on the sewing machine using a bar tack.  I'm undecided yet as to how we are going to sew them all together.  Crib, twin, queen... but for now I'm just playing with a running stitch. 
Today is a weird day for me.  The kids all went to work with their dad.  The grown kids and baby are out of state.  I'm left alone in the house.  The only time that happens is when I'm sick and they go to church.  Not very much fun.  SO what to do all on my own...  First, don't let the creepy quiet house bother me. Music.  That's what I need.  And I can listen to anything I want as there's no one else's taste to consider.  Decisions decisions.  I have a quilt on the quilting frame that could use a couple passes.  My limit as it gets a bit tedious. I am wanting to hand sew a civil way reproduction shirt for son #3.  He loves to participate in re-enactments.  Wouldn't he be surprised if I got it done for Christmas?  The pattern is online and it involves just measurements- it's called a square shirt- and no directions.  Ya have to go authentic to get any points for effort. So I need to search that out and print it up.  I need to bake an apple cake for Thanksgiving.  It's tradition.  Pumpkin pies, tomorrow. So I have a full day. Then, there's always the yoyos and the easy chair...

Thursday, November 15, 2018

 Zipper bag: A tutorial...

I've never done a tutorial online.  In a blog.  How many pictures should there be?  Will I be able to describe in words clear directions? So here goes nothin':

This cute bag is made from a table place mat.  I bought this one at a thrift shop for a buck. You'll also need a plastic zipper- any size is fine as long as it will at least fit across the short side of the place mat.  See?  Mine's much longer- no problem. And 20" of strapping.  That's it.  Pretty simple. 


Unzip zipper and pin onto the place mat with right sides up.  (Both the zipper and the place mat is right side up.)  Any where along the zipper is fine.  I usually space mine somewhere in the middle.The plastic zip coil should be showing along the edge of the place mat.


I usually stitch along the top stitch sewn seam of the place mat.  It is very close to the zip, but will still be out of the way.


 Next, sew the second side of the zipper. Make sure that the place mat is centered on the zipper so that the zipper tab meets at the same place on both sides of the place mat. 


Add caption
Unzip zipper and pin second side of zipper to opposite side of place mat. Sew second side of zipper onto place mat the same as the first side.

When the bag is folded in half, right sides out, it looks like this:  But we're going to turn it inside out for the rest of the sewing.  I forgot to take a picture of it, but now is the time to open the zipper halfway. (Or else the zipper tab will be cut off your bag!)


This is a tab and I put them on either end of the bag to help with pulling the zipper opened and closed. (I made my own strapping by cutting a 20"x 4" piece of fabric, folding it in on itself and stitching 1/8" from either side.  This tab is 1" x 4", folded in half.)

Making strapping


I fold the place mat in half with the zipper centered down the middle. Tuck tab with raw edges running along the outside edge of bag and under the end of the zipper and back of bag and stitch along the side- being sure to catch the tab.  I use a 3/8" seam allowance. Repeat on the second side- MAKE SURE YOUR ZIPPER IS AT LEAST HALF WAY OPEN!!   Otherwise you won't be able to turn it right side out.  Seam rippers do exist, so all is not lost if you forget and sew it up tight.


Trim excess zipper off from the top and bottom of the bag. 


 At this point, you have a perfectly serviceable bag, but I like mine to stand up. This is what is called a box bag. 


This is the hardest part to describe.  Leaving the bag inside out, match an end seam up with the fold on the sides of the bag.  It will make the bag come to a point.  Draw a line 1.5" across the point and sew on that line.  This is what makes the square corners of the bag.  I slide a strap the width of my place mat into these corners of one side and when it's all sewed up- tada. Your bag has a handle.  This is called a "Box bag" and you can youtube to get a step by step tutorial video. They just tend to be a little long and I like to keep things as simple as possible. But sometimes you need to see it being done to get a grasp of the concept.

handle on end


This is what the bag looks like when it is finished- but not turned right side out.  See how there are no raw edges?  The lined place mat makes a lined bag.


I use mine for hand sewing projects.  My grandson keeps his quiet time toys for church in it. My daughter in law stores her make up in one. They're just a nice size and a really quick project- about 30 minutes. Probably less.
 Ice storm...

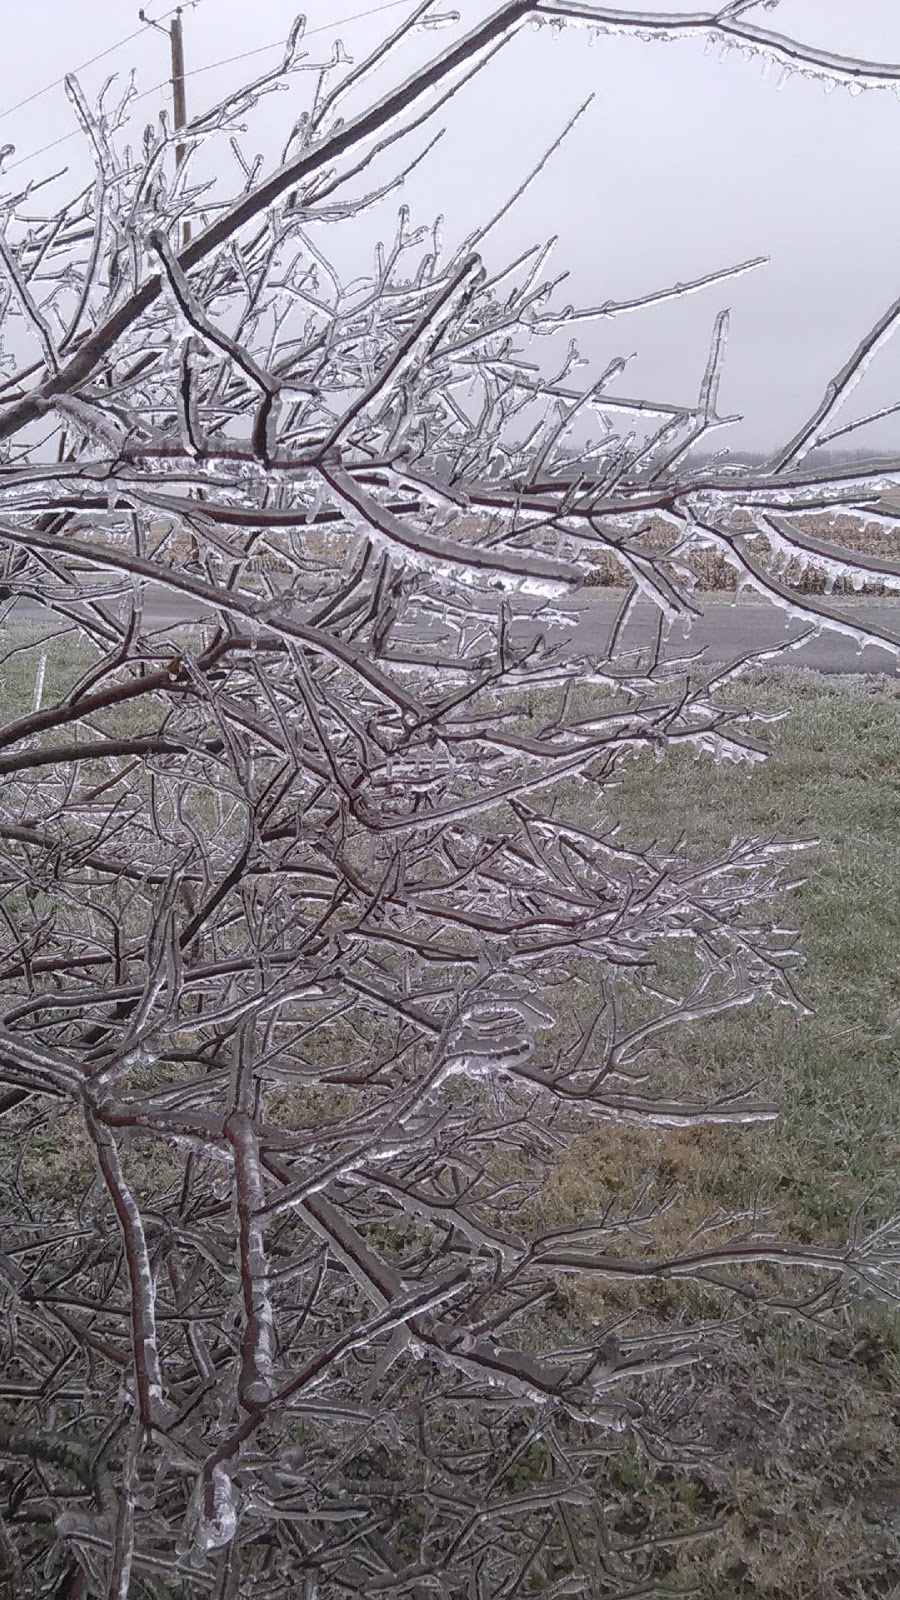
The winds kept me up for a couple hours last night.  Winds are common place here, but the pecking of ice on the windows is a bit more ominous.  Good news, we still have power. I thought I'd share some of the beauty with you.  The air after an ice storm always smells especially sweet.  I'll spare you the havoc that the ice wreaks on our trees.  Trees in this neck of the woods are honored, I guess because there are more fields than anything.  So when a tree is taken out, or nearly so, it's always a bit sad. But you can't deny that the ice is awfully pretty and if you can't take the bitter with the sweet then you can't be a very well adjusted person, now can you? 
 The flower garden that went to weed at the end of the summer now has it's own sort of beauty.


 This garden ornament is my favorite picture after the berries. 

The grass shatters when you walk on it and makes a slight jingling noise.

My sweetheart broke the handle on his truck door trying to get into it, this morning.  Wonder how long this will take to melt?  


Monday, November 12, 2018

 Easy does it...

I don't know about you, but I like to ease into the week.  I am blessed with being able to work from home.  So I'm wearing a ratty sweater- holes and all.  Box of tissues at my elbow- sinus infection. Pumpkin roll- remedy to a low blood sugar. My daughter is an assistant baker at a bake shop and she brings home some amazing goodies. Thoughts of sewing. Just taking things slow. 


Thread guide... maybe you'd be interested in this little gadget.  It's such a small and insignificant thing, but it works like a dream.  A dress maker would never be able to grasp the concept of how much thread a quilter goes through.  Where they buy a spool, we buy a cone.  My cone is getting low.  That's alright, I have a drawer of extra ones.  This guide keeps the tension nice and also keeps the cone from skittering across the table.  It's just a dowel rod with a hole drilled in the bottom, and an eyelet screwed into the top.  You could put your cone in a mug if you're still having skittering problems. The cones sure are nice when you're winding 25 bobbins at a time.  Barely makes a dent in the thread.


This is one of the little bags I make from ready-made place mats.  I actually made this place mat from some scraps, but I usually buy the place mats at a thrift shop for a buck.  The bags sell for $10.  Not bad. The place mats are lined and the edges are finished so there are no raw seams. Think they will make nice Christmas gifts- stuffed with some fun things. A lot of nurses buy them to store their stethoscopes and such.  Keeps toys separate in diaper bags.  Store make up.  Just whatever. Takes me about ten minutes to whip one up. Pioneer Woman has some really pretty place mats.

Saturday, November 10, 2018

 Homely...

  In the US when we say "homely"  we're describing something dowdy, ugly.  But I've seen some home improvement shows from the UK and when they say "homely" they're using it as we would "homey."  Something cozy and warm. This one has the bases covered.  It's homey and homely. It's a client's quilt and I'm impressed with it- in that it's entirely hand stitched. It's just not entirely pretty.  But very homey.  And I think it will look sweet on a bed.  Of course, I've never actually met a quilt I didn't like on some level. As you can see, I'm just meandering it and she is using a Warm and Natural batting so with one wash it will have an even more homey feel and look to it.  It's growing on me.

Sleepy head...

I just couldn't resist sharing this picture.  He was eating some cheese puffs and then he wasn't. Fell asleep with his hand in the "cookie jar."
 
Blitz...

This is my fat goat.  I love him as much as any one ever loved their dog. OK, maybe that's an exaggeration as some people are just a a little over the top with their dogs.  But you get my point.  We love him.  He moves around the property taking care of weeds and overgrown grass.  He loves people.  He especially loves to be read to. He never head butts. But if you punch him on the top of the head, he practically purrs.